DocsGPT CLI 1.0: From Chat to Agentic Terminal
If you've been using the DocsGPT CLI to ask quick questions from your terminal, the workflow probably looked like this: ask a question, get an answer, copy-paste whatever command or snippet it suggested, run it yourself. Functional, but a lot of manual shuttling between the AI and your shell.
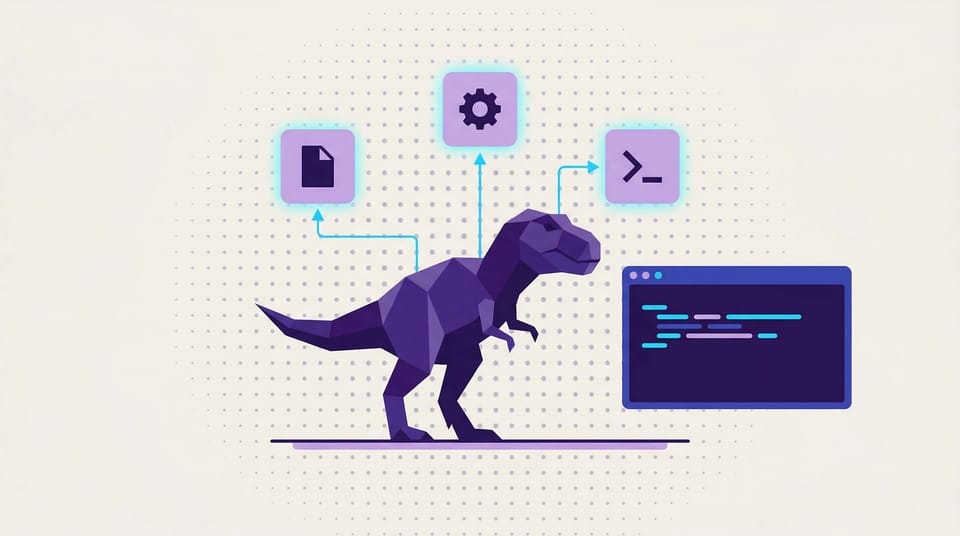
CLI 1.0 closes that gap. Your DocsGPT assistant can now read files, write files, and run commands directly on your machine, all within an interactive chat session where you approve every action before it happens.
Interactive Chat with Multi-Turn Memory
The original CLI had one mode: ask. You'd fire off a single question, get a response, and start over. There was no conversation history, no follow-ups, no building on previous context.
The new chat command opens a persistent session. Ask a question, get an answer, then follow up without re-explaining what you're working on. The conversation stays in memory until you /clear it or /quit.
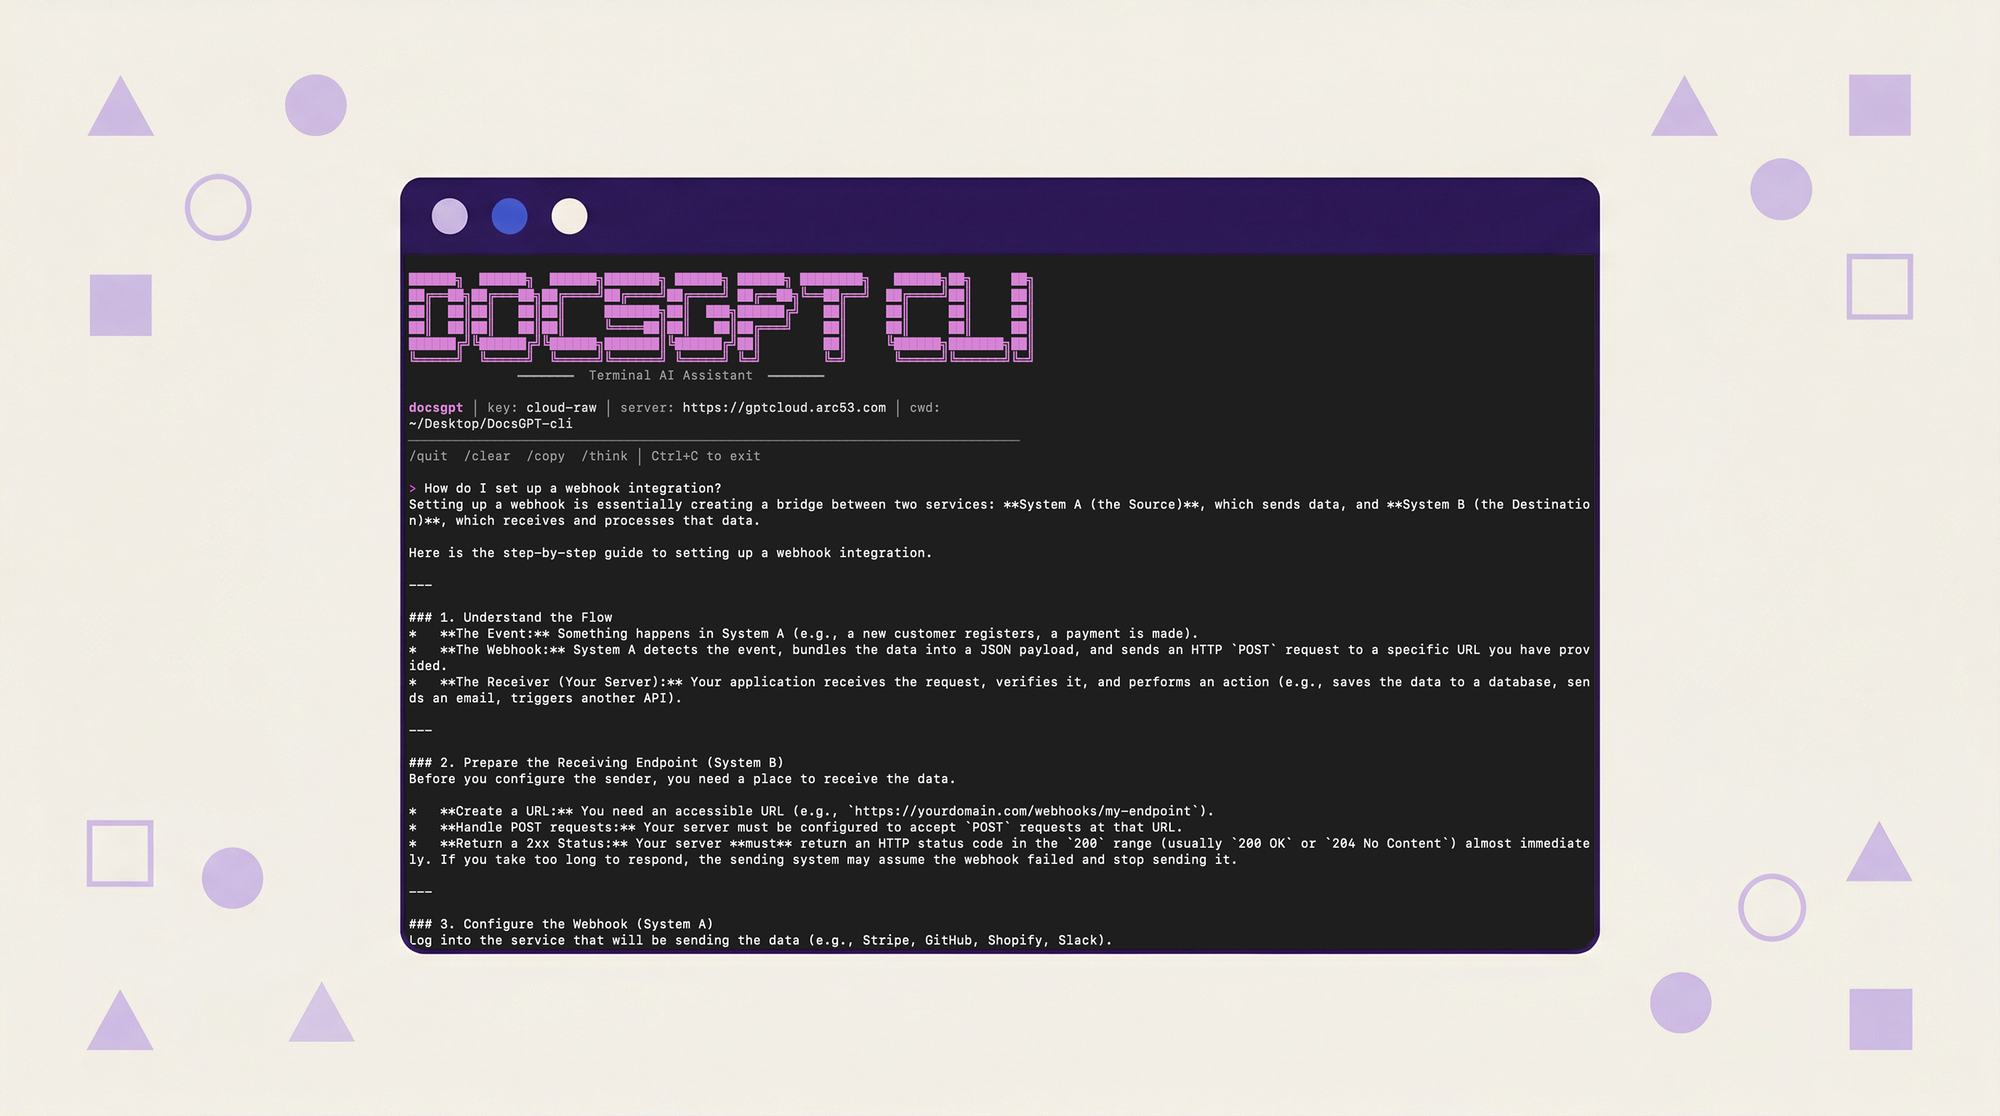
docsgpt-cli chat
> How do I set up the webhook integration?
# ... assistant responds ...
> What about error handling for that?
# ... follows up with full context of the previous answer
Three slash commands keep the session manageable:
- `/quit` — end the session`
- /clear` — reset conversation history`
- /copy` — copy the last code block to your clipboard
Tool Use with Human-in-the-Loop Approval
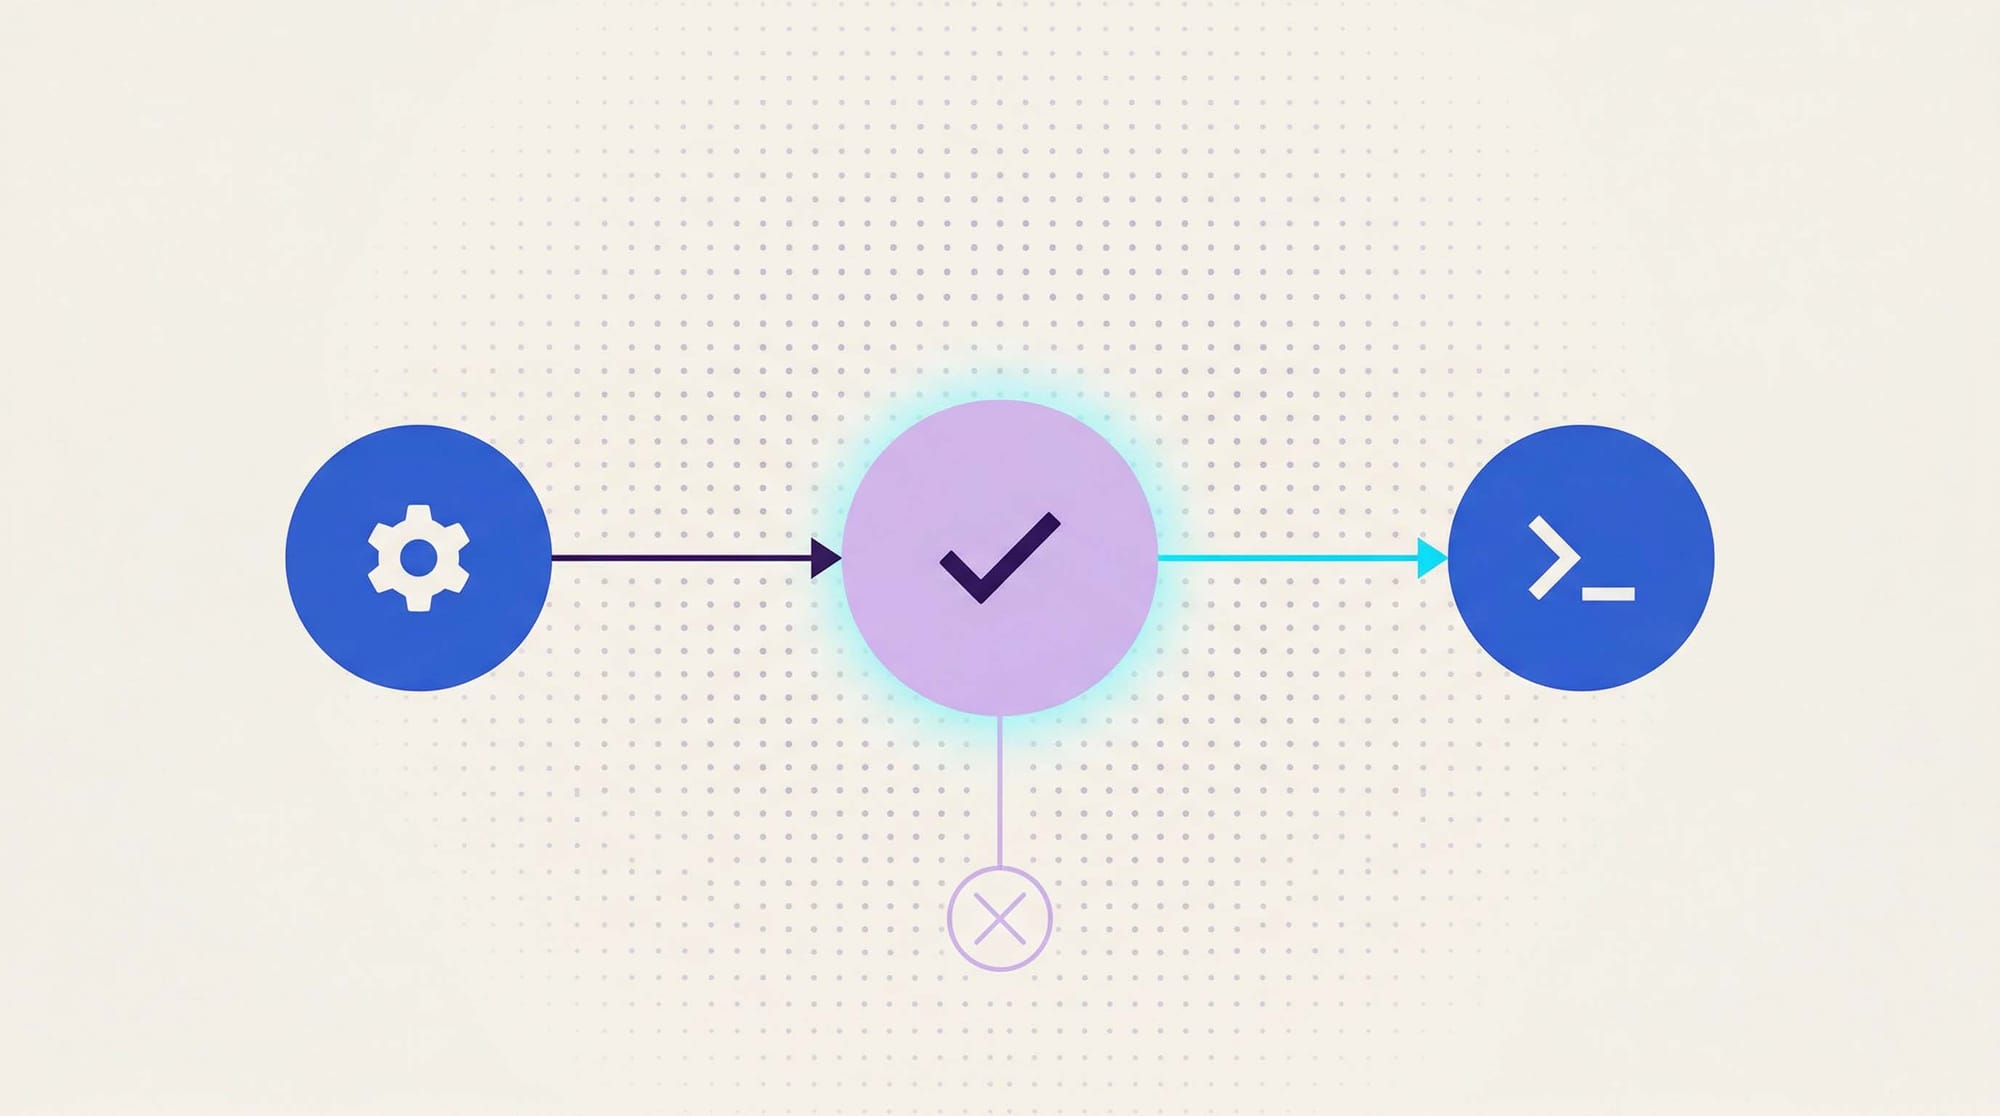
This is the biggest change in 1.0. The CLI now supports three tools that the AI can invoke during a conversation:
- run_command — execute a shell command
- read_file — read a file's contents
- write_file — write content to a file
Every tool call goes through an approval step. When the assistant decides it needs to run a command or touch a file, you see exactly what it wants to do and choose:
🔧 Agent wants to use tool: run_command
   $ git status
   [A]pprove  [D]eny  [E]dit >
[A]pprove runs it as-is. [D]eny blocks it and tells the assistant why. [E]dit lets you modify the command before it executes. For `write_file`, you get a preview of the first five lines before deciding.
This means you can have conversations like "check which tests are failing and fix the import paths" and the assistant will actually work through the problem, reading files, running tests, and proposing edits, with you confirming each step.
Safety Guardrails Built In
Approval alone doesn't catch everything, especially if you're moving fast and hitting "A" on autopilot. The CLI also ships with a command blocklist that prevents the most destructive operations regardless of approval:
rm -rf /andrm -rf /*mkfs,dd if=, writes to/dev/sdor/dev/nvmeshutdown,reboot- Fork bombs
If a blocked command comes through, it gets rejected before you ever see the approval prompt. The --auto-approve flag exists for power users who want unattended workflows, but the blocklist stays active even then.
Context Enrichment: The Assistant Knows Where You Are
One thing that made the old ask command feel disconnected was that the AI had no idea what you were working on. You'd have to paste in file paths, explain your project structure, describe your setup.
v1.0 fixes this with automatic context enrichment. By default, the CLI sends:
- Your current working directory — so the assistant knows which project you're in
- Directory contents — so it can reference actual files without asking
- Your last few shell commands — so it understands what you just tried
All of this is configurable through docsgpt-cli config. You can toggle each signal on or off, or adjust how many history commands to include. If you'd rather send nothing, --no-context disables enrichment entirely for that session.
Streaming with Reasoning Visibility
Responses now stream token-by-token instead of arriving as a single block. If your DocsGPT setup uses a model that exposes reasoning tokens, those appear in dimmed text so you can watch the assistant think through a problem before it gives you the final answer.
This is a small detail, but it changes how the CLI feels. Watching the reasoning stream in real-time makes it clear when the assistant is considering multiple approaches versus confidently heading in one direction.
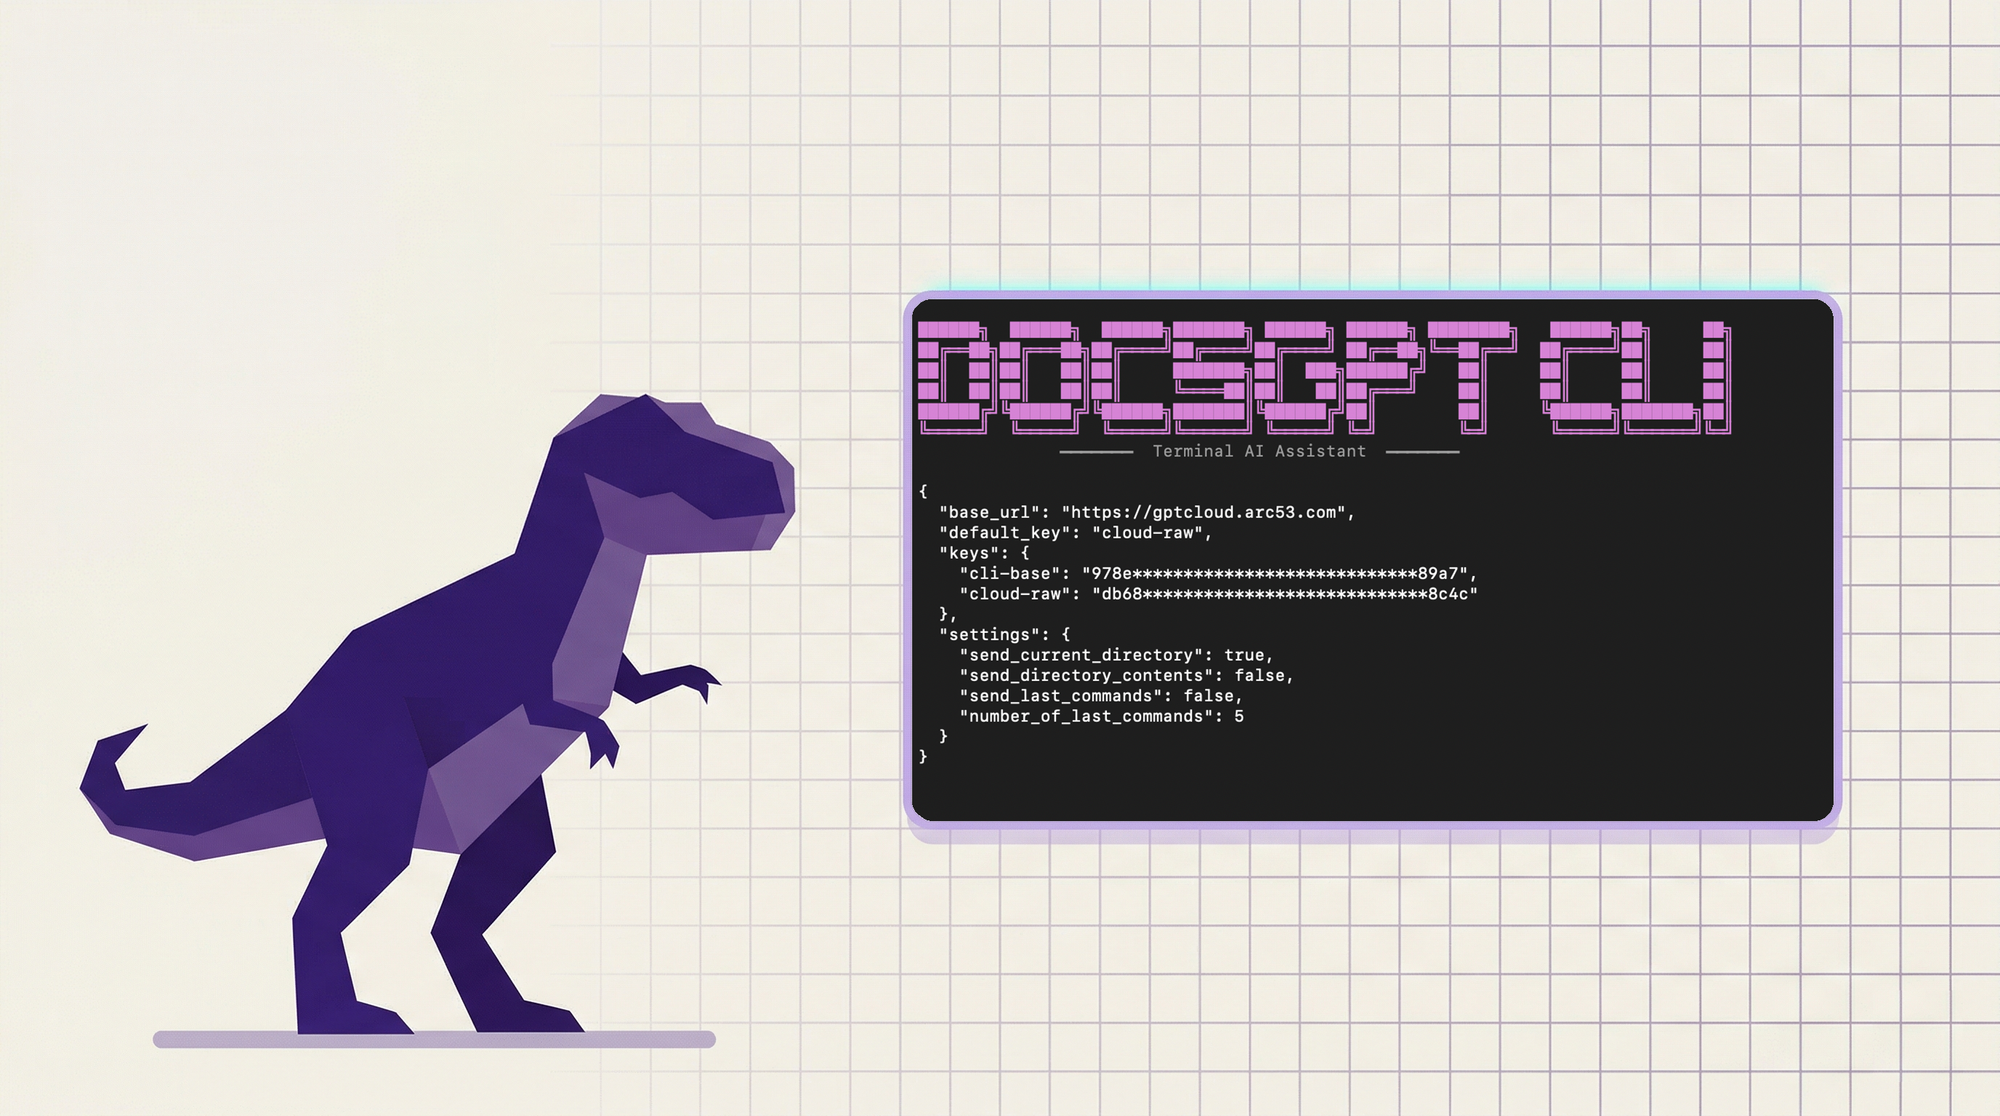
Unified Config and Painless Migration
The old CLI stored API keys and settings in separate files scattered in your home directory (~/.docsgpt-keys.json, ~/.docsgpt-settings.json). v1.0 consolidates everything into ~/.docsgpt/config.json and handles migration automatically. First time you run the new version, it reads your old files, merges them into the new format, and renames the originals to .bak.
New global flags also make it easier to work across multiple DocsGPT instances:
docsgpt-cli chat --key work-api     # use a specific named key
docsgpt-cli chat --url http://localhost:7091  # point to a local instance
docsgpt-cli ask "explain this error" --no-stream --timeout 60
Install in One Line
If you're on macOS with Homebrew:
brew tap arc53/docsgpt-cli
brew install docsgpt-cli
Otherwise, grab the binary from the GitHub releases page and run docsgpt-cli install to add it to your PATH.
What's Next
The tool definitions in 1.0 are deliberately minimal: run, read, write. That's enough to handle most terminal workflows, but the architecture is built for more. Expect the tool set to grow as DocsGPT's agentic capabilities expand.
If you've been using the CLI for quick lookups, try chat mode for a full work session. The difference between asking questions and having an assistant that can act on the answers is significant.
- Try DocsGPT Cloud ☁️
- Explore the Repository 📚
- Join our Community on Discord, X and LinkedIn 🤝